Showing posts with label recipes. Show all posts

Friday, 3 January 2020

3 ingredient cookies variations

In 2017 I wrote a blog post with a cookie recipe I called 3 ingredients cookies, although the internet knows it more under the name of "Nutella cookies". I myself made them with Nutella only once, but did them many times with all sorts of spreads.

The following pictures were not taking this January, they are older. I wanted to share some variations I made with you anyway.

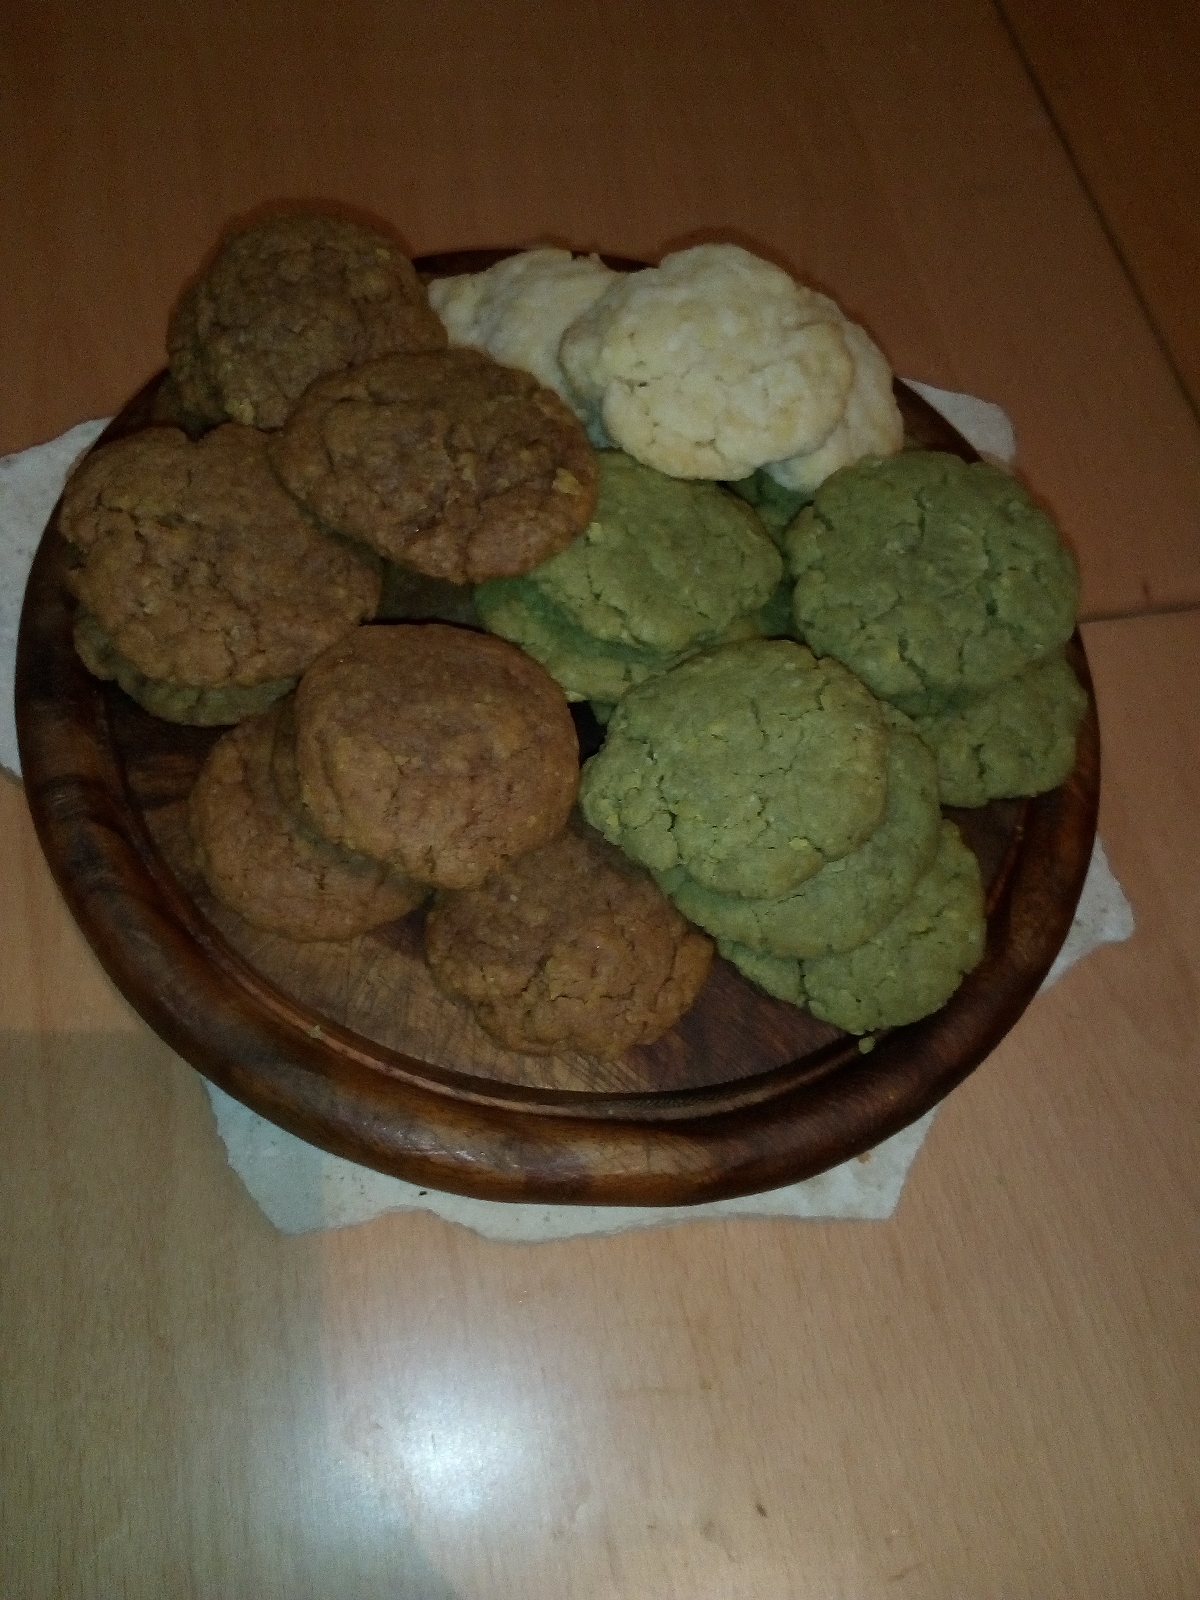
In May 2019 I found pistaccio spread:


That same day I also made my favourite cookies with friends with caramell sea salt spread (the brown ones). I did announce that there is "Bounty cream" to those friends to get a variation of coconut cookies. I blieve those versions of spreads like Bounty/coconut, Mars, Mily Way and the like are just temporarily available, I haven't seen them a lot lately, only the occassional Mars one maybe. I didn't find "Bounty Cream" that day, but a similar suitable coconut spread (the white cookies):


Another posibility for cookies are with M&Ms, but they are big and large (make sure to stick the M&Ms well into the cookies, otherwise they may drop out and away from the cookies during the cooking time in the oven:


I found that smarties are more practical, because they are smaller:

There's a brand available here called "Chocolate Symphony". A dark chocolate version can be seen here:


They have all sorts of variations, mostly in 200 g jars, which is just what you need for the cookies. The spread is easy to get out of the jar, the labels can be taken off the jars very easily with no traces of the glue left, which I think makes them great to reuse. Check those out and get them, if you can. I always do.

Here's the webite of the company: https://brinkers.com/brands/chocolate-symphony/

Leave me a comment what kind of variation you'd like to try or have tried already.

Thursday, 26 September 2019

Banana oat cookies

 Ingredients:

2 bananas

100 g oats (2 cups)


Instructions:

Preheat the oven to 180 degrees C (350 degrees F).

Peel the bananas and mash them up in a bowl with a fork.

Add the oats and mix it all together.

Make small balls and put them on a baking sheet (press down on the balls to flatten them, if you like) and bake for 15-20 minutes.

Enjoy!


Monday, 9 September 2019

Puff pastry rolls

Ingredients:
1 roll of puff pastry
1 pot of sour cream (or cream cheese with spices)
100 g (2 cups) grated cheese
1 package of diced bacon

Alternatives/variations:
As an alternative to the bacon salmon works great, too. There's a ramson cream cheese here in Germany that I think is a nice combination with that. I haven't tried other variations personally. Write in the comments, what combinations you tried.

Shopping tip:
Unless you're grating your own cheese, they will sell 200 g packages of cheese in Germany only. So might want to think of doubling the amounts and make one with bacon and another with salmon.

Instructions:
Preheat the oven to 200 degrees C (392 degrees F)
Roll out the puff pastry and first spread the sour cream on it. Make sure to cover the edges, too, otherwise the rolls on either end of the roll will be "slim".
Next spread the bacon/salmon on it.
Lastly put on the grated cheese.

Now you're going to roll it. There are 2 variations: Rolling it from the short end will give you fewer rolls, but they'll be bigger. About 10. Or 2: Roll up the long side. It's a bit more tricky, because it's longer, but it'll give smaller and more rolls. About 16.

I personally prefer smaller rolls and cut mine about the size of the tip of my thumb to my first knuckle. Which usually is about 16-18 rolls. Place the rolls on a baking pan with some space between them. They will rise.

Put the rolls in the oven for about 15 minutes, depending on how brown you want them to be.

The rolls can be eaten hot or cold.

Enjoy!

Rolls with diced bacon:


Salmon rolls:


Friday, 22 September 2017

3 ingredients cookies

“Mm. Smells good. What's wrong? You only make those when you need to calm down.” Joan Watson in “Elementary” (Season 2, episode 16) when she enters the kitchen in the morning and Sherlock Holmes is just about to get the Yorkshire pudding out of the oven.

Sherlock Holmes is someone you wouldn't call normal. Naturally he's got some weird traits and characteristics. Cooking and baking is not my passion, although I can do some things that others actually like. So it's very strange for me that Sherlock Holmes in Elementary seemingly is baking to calm down and I now started to do the same, preferably using one recipe when I am frustrated, namely the following:

Ingredients:
1 cup Nutella (or other chocolate spread)
1 cup flour (or maybe a bit more)
1 egg

Directions:
Pre-heat oven to 330 ° F (160 ° C)

Put all the ingredients in a bowl, mix with a spoon or hand-held mixer. (Those of you who use a spoon, you can easily make the recipe in the middle of the night without disturbing your room-mates or neighbours at all.) Take a small piece of the mass, make a ball out of that. Squish it flat and put it on a baking sheet with baking sheet. Repeat until dough is all used. Should make about 16 bits.

The cookies will rise a bit, so really keep it rather small and flat with a bit of distance between each.

Baking in the oven for about 5 to 10 minutes, until the cookies aren't that much wet and shiny anymore as they will be the first minutes. A bit shiny is absolutely fine.

Afterwards let them cool a bit. When they're right out of the oven the cookies are not only hot, but also fall apart fairly easily. Cooled down a bit they're harder.

The original recipe is with Nutella spread, which is available everywhere here in Germany. I have made the recipe already with white spread (which needs considerably more dough). My favourite cookies are with a caramel sea salt spread I was lucky to find at Edeka. I also used dark brownie spread and peanut butter as well (with and without peanut bits). For that one however I probably have used too much flour, because the cookies were rather dry for my taste. I personally don't like the Nutella-cookies as much as I do the Nusspli-cookies, a different kind of chocolate spread, which is available here.

Try it out. Let the spreads that are available in the shops in your area inspire you. You're welcome to write in the comments which spreads you tried and how you liked the cookies.

Saturday, 19 December 2015

Fortune cookies

Dear reader,

I'm always at certain friends on New Year's Eve and I always like to get a small present with me for that circumstance. Now I always get a bunch of glow lights and the year before last and the year before that I had made caramelised nuts. Years before that I once thought I could make fortune cookies myself. Judging from the pure recipe, they're relatively easy to make. My sister, who is more experienced with baking, helped me dividing egg white and yolk as well as getting the cookies on the sheets and removing them. The really difficult part with that is that you have to work fast, because the dough on the one hand has to be baked to a certain degree to be able to shape the circles you put on the sheet to their typical fortune cookie shape and of course you've got to put the slip of paper in as well. On the other hand the fresh cookies, when they come right out of the oven are of course very hot and if you wait for too long, they get hard and you can't quite shape them anymore.
I don't remember anymore which recipe I actually had used, but the following one from allrecipes.com is an example of how it's typically done. I spare me copying the recipe here and just give you the link instead:

I'd suggest looking up the fortunes ahead of everything else and either writing them by hand or on your computer and printing and cutting them out. I forgot which fortunes I used. I'm certain there are many pages with fortunes for fortune cookies to be found with your preferred search engines. Just look for fortunes that you like best.
I still have a small note on my cookies though: of course I wanted to make a test run (or rather test baking) before my visit with the friends. So I made a few cookies just for us as family, but already with the fortunes in the cookies. So I had a small bowl with cookies sitting in the living-room and my father, who didn't know about the cookies, saw them and put one whole one as it was in his mouth. I cried out in horror that there was a slip of paper in! He fumbled with his finger to get the paper out of his mouth and threw it in the waste without a further glance on the paper. After that experience I told the friends and everyone, who grabbed one of the cookies on New Year's Eve, that they have a slip of paper in them. Contrary to my father, the friends took it for granted and ate the cookie accordingly with caution. ;-)

Until next blog,
sarah

Friday, 6 November 2015

Pumpkin jam

Dear reader,

while most people I know dart for pumpkins for pumpkin soup, I prefer another way and make pumpkin jam. It's super easy, super fast and super tasty!

Ingredients:
1 butternut pumpkin (some also call it “squash”)
1 pack of 500 g jam sugar/jellying sugar
2-4 cups of water
additional ingredients you like

You'll also need a hand-held blender.

Many use a hokkaido pumpkin for pumpkin soup. I used it to make the jam last year. It's working, but I find that the hokkaido is tough and inconvenient. I therefore recommend the butternut/squash, which is softer and longer in shape. Advantage with the butternut is also that the seeds and fibres are only at the bottom part of it, whereas the hokkaido has the seeds and fibres “eveywhere”, because it's rounder.

By the way: both pumpkins have a bark that can be cooked and is edible! Although I'd suggest that if you do something else other than the jam, it may be good to peal the bark and cook it a bit earlier than the rest, which is softer and will take less time to cook.

1.) Cut the pumpkin in half and take the seeds and fibres out. I like to take a table spoon for that. Cut the two halves once again and than those halves again as well. So all in all three times cutting in halves. Divide the slices into smaller pieces to get square bits. They don't have to be small, thin squares. But keep in mind: the smaller the pieces, the softer they will be after they're cooked. So cut them not too big, but also not too tiny.

2.) Put the cut pumpkin pieces in a large pot with a few cups of water. Don't measure the cups as such, the water is just there so the pumpkin is softer faster. So it doesn't have to be exact cups. Cook it until it's boiling and then set a timer for 10 minutes. Stir every now and then. Put the lid of the pot on top, if you like. That's optional.

3.) When the 10 minutes are over, take the pot off the stove and blend the pumpkin pieces with the blender. If you like, you can keep some of the pieces, of course.

4.) After that, put the pot back on the stove. Add the jam sugar/jellying sugar and keep stirring while it's heating up again. Stirring is important. Otherwise the sugar will either burn your pot or the jam. Feel free to set the stove on maximum at first. But the jam will be thick liquid and towards the end it may produce bursting bubbles. So it may be better to set the stove back a bit then. When the jam is bubbling evenly, set the timer for 5 minutes.

When the minutes are over, fill the jam in jars. Alternatively you can (carefully!) add a bit of cinnamon for the taste. It's easy to add too much cinnamon. So be careful and take only a little bit at a time and keep tasting it. You could also add pieces of apples or grate one apple or add a glass of apple sauce when cooking the pumpkin pieces the first time or whatever else that comes to you mind.

As you can see: the jam needs only 10 + 5 minutes of cooking time. Once the pumpkin is cut into pieces, the most time-consuming part of the recipe is done already. The jam is something like a 15-minutes-jam.
American recipes on the internet take white granulated sugar instead of jam sugar/jellying sugar, depending on the taste either in the same amount of what the cut pumpkin pieces weigh or a bit less sugar. I only made it with the jam sugar/jellying sugar so far.

Have you made pumpkin jam already? And if so, how did you make it?

Until next blog,
sarah

Friday, 15 May 2015

And some more dandelions

Dear reader,

only a short entry today in addition to my previous dandelion jelly entries from last month. The season of dandelion flowers seems over for this year already. But the flowers are far from the only thing you can use. Also the roots can be used for dandelion coffee, which has been made a lot after the war. Since it's caffeine free, you can also drink it late at night.

Paul Tappenden has a video on making dandelion coffee. He seems like nice guy and also explains very well what to watch for and how to make it easy and fast.

Mother Earth News also has 9 things to do with dandelion. And if you're still not convinced that dandelions are healthy for you, check out this list of 11 health benefits of dandelion and dandelion roots.

And here's a Dandelion Greens Pesto for you to mention just some examples that might be unusual for you to get you started.

As promised, only a short post for you today. As you can see, dandelion is very versatile as well as healthy and there's no reason to just exterminate it. Might as well use it. It's far from just a wild weed. A while ago I read on a German forum that there's no such thing as a weed anyway. It was something like: "There are only wild herbs growing at the wrong place."

Certainly you can get creative with dandelions and other wild herbs, too. Tell me about your (taste) adventures in the comments.

Until next blog,
sarah

Sunday, 26 April 2015

The end: dandelion jelly part 2

Dear reader,

“this is the end, beautiful friend”, as Jim Morrison sang with The Doors back then. But the end of one thing is also the beginning of another: in our case the end of cooking and the beginning of really yummy sweet-hearty jelly.

With a bit of delay now the last step for the jelly. For the last step you take a strainer and fill the brew in a measuring cup. You only need about 750 ml of it and don't need the flowers anymore. I am lucky: with two guinea pigs as my flatmates, I just give the flowers to the guinea pigs to eat.

The recipe says to add 2 table spoons of lemon juice. So far what I've done is cutting the lemon in two halves and just squeezed one half with my hand holding the hand above the pot. I'm not that exact with amounts here. (Sorry again for ml measurements, keep to the American cup-based recipe from my previous post, if that's how you cook.)

  1. Give 750 ml of the brew back into the pot, add the jelling sugar and a bit of lemon juice. Let it cook for 4 minutes, immediately fill it in the glasses. Put the lid on.

With American Youtube videos I saw that they had other lids than we have here. In America it's also common to disinfect the glasses and lids in a hot water bath. For me it's enough to have them washed clean.

Some want to fill the jam or jelly in hot washed glasses. Sometimes they want to turn the glasses upside down on the lid for a bit.

Do whatever you're used to, if you made jam or jelly respectively do whatever feels safe for you, if you're scared germs could get in the glasses. Personally I feel comfortable enough to just wash the glasses with dish detergent and water. I also don't turn my glasses upside down on the lid.


Generally they say that self-made jam or jelly is only edible for about a year. Don't panic, if you make it now in April and only eat it in May next year. It should be perfectly fine to eat then. As long as the jelly looks good and smells fine, it should be good to eat even more than a year after making it.

As you can see, the recipe is really simple. Almost the most time consuming thing is to pick the flowers. You really have to make sure, the peduncles are short enough. My jelly now got a bit bitter, because in my joy about dandelions, I had too much of the peduncle parts in it. (Maybe better to actually pick 200 flowers and pull the yellow petals out after all.) The jelly is not ruined or poisoned because of that. It just tastes a bit more like bitter orange jam. The bitter-tasting components are not dangerous. Those especially are great for tea if you have digesting problems. More on that in another post. I'll write more about other possibilities to use other parts of dandelions and other ways to use dandelion flowers, too. Also what you have to keep in mind when making dandelion tea. Dandelions are far more versatile than most of us suspect and healthy too!

Have fun cooking and enjoy eating the jelly!

Until next blog,
sarah

Thursday, 23 April 2015

Dandelion alert... or dandelion jelly part 1

Dear reader,

finally it's time: the dandelions are blooming in the garden I share with my neighbours here. Time for me to get the dandelions. I never would have thought, that I'd be craving for dandelion. The jelly is really good thought and very easy to make. At least the recipe I use. By the way, my father usually doesn't like jelly, because jelly easily falls from the bread roll. He liked this jelly a lot though. I'll write you the jelly the way I make it. Other variations are also possible, of course. I'll write you those, too. First of all my recipe with comments. There really are just two steps, if you don't count picking the dandelions:

(The recipe I use is very American unfriendly, I suppose with g and l and not cups. Anna Hackman from Green Talk has a cups-based recipe similar to mine)

Ingredients:
150 g of dandelion flowers (or better 200 petals and only use the yellow part)
1 litre of water
2 table spoons of lemon juice
500 g jelling sugar (again sorry, American readers. I understand that most Americans use sugar and/or pectin. I never have. Follow Anna Hackman's recipe, see link below).

It's best to pick the flowers around noon, when they are in full bloom. Closed blooms don't have the full aroma like open ones. Therefore I'd also suggest to use the flowers right away or let them sit for no longer than one night. Drying flowers also close. Also you should ideally pick them in your own garden or at least as far away from exhaust gasses as possible, they also should be as pesticides free as possible, also don't pick them where lots of dogs are known to leave their marks and such. Kids and grandchildren are certainly easily animated to pick them and enjoy doing it.

The easiest way to pick the flowers is either to come from above, close your fingertips around the bottom of the flower and pull. Alternatively you could also get underneath the flower, palm facing upwards, with the peduncle between your index and middle finger just pull upwards. Both methods are easy to get the peduncle cut quite short from the flower most of the time. Check it still, if everything is as short as can be. Otherwise the jelly will be bitter, which would be atypical and means there have been to many peduncles and bitter-tasting compounds that go with them. Or pick 200 flowers and pull out the yellow petals. It's not that much more work and the bitter components are definitely not in the jelly then.

Once you have the flowers, this is the first step:

1. Put the flowers in a pot, add the water and let it boil. Once it boils, let it boil for about 5 minutes. Then put the lid on it and let it just sit for about 24 hours. 
That's it already for the first step.

Anna Hackman from Green Talk says that you can let the juice sit over night. Here is the recipe she uses.The American cups are certainly rather strange for German-speaking people. I'd suggest in any case to cook the flowers that very first time right away, which shouldn't be too hard. It's done fast.
Dandelion honey is a bit different, although similar. For that the most people actually cut the yellow petals and don't use any green parts at all. I found a German website suggesting to use the tops of fir needles as an alternative, too.

Another German website suggested adding pieces of apple or a glass of apple puree. A good advice from there was to add fruits with not too strong a taste of its own, because it will cover the rather soft taste of the dandelions.

A well known and often used German website for recipes has several variations of dandelion jelly. One suggested using 1 litre of (naturally cloudy) apple juice instead of 1 litre of water to boil the flowers in. Certainly a variation I'll test soon.

The recipe I used had 100 g of dandelion flowers and 50 g of daisies. But the latter are considerably smaller and almost don't grow in my garden, so I take 150 g of dandelions. I'm sure the recipe could also be used with other flowers just as well. For example the other day I watched similar recipe with rose petals.

I'd definitely suggest for you English reading readers of my blog to check out Anna Hackman's dandelion prep video.

Sustainable Mama does it the “American way”, watch her video for ideas how you can do it with cups and that. Sustainable Mama as well as the Stillman's Family sterilise their can's. I found that all American videos I watched have that. I don't do it. But we have other cans anyway. Just watch the videos I list here, you'll get ideas how to do it, I think.

The Stillman's Family also has a great video, she shows how to pull the petals out, so she's closer to dandelion honey.

2leelou Preserves has another rather extensive (15 minutes) video, but she's quite charming, I think and thorough in her explanations and really shows you step by step.

I hope the videos help you and compensate for the rather not so helpful not-cups recipe I have listed here on my blog.

So that's it for the first step. I'll post the final step tomorrow, when I will have done it with mine, too.

Until next blog,
sarah

Monday, 31 December 2012

What do cooking recipes, troy and the bible have in common?

Dear reader,

today after dinner we sat together for a bit longer and the talk came to cooking and recipes. My dad mentioned that we still have an old recipe book of recipes his mom collected and wrote down over 60 years ago.

My sister said that she had seen recipes, where certain kinds of dough as part of the recipe was mentioned, but without an instruction as how to make the dough. The knowledge of how to make the dough was taken for granted.

My dad then said that he heard once that for a long time, people didn't know where troy was located. There hadn't been old cards or descriptions of that. When troy existed, everybody knew it anyway. My sister first couldn't quite believe, that people of younger times first didn't know, where troy was.

As I heard them talk, I remembered the book on the gospels, which I had given my dad a couple of days ago. One problem, which we face today, when it comes to interpreting the bible texts is, that some of that knowledge was simply known and taken for granted back then. That's why the preachers and prophets didn't have to explain themselves and were able to simply use certain words and everybody understood and knew. I explained that to the others and we agreed that in all three cases, there was knowledge taken for granted and (maybe) in these days, had to be discovered again first. (My sister took care of that by writing down some basic recipes in one of her books.)

Until next blog,

sarah